Difference between revisions of "Deploying your Image a single client"
(→Start the Task =) |
(→Start the Task) |
||
| (2 intermediate revisions by one other user not shown) | |||
| Line 23: | Line 23: | ||
#Login to the web UI. | #Login to the web UI. | ||
| − | #Click on the ''' | + | #Click on the '''Image Management Section''' (picture icon). |
| − | #Click on '''List All | + | #Click on '''List All Images''' and locate the image object you wish to associate with the client. For more information on how to create an image object see [[Booting into FOG and Uploading your first Image]]. |
| − | #Click the '''Edit''' button next to the | + | #Click the '''Edit''' button next to the image. |
| − | # | + | #Select the appropriate operating system from the drop-down menu, if you have not done so already. |
#Click '''Update''' | #Click '''Update''' | ||
| + | #Click on '''Host''' from the left hand column. | ||
| + | #From the menu in the center, select the client you are working with and click '''Add Image to Host(s)''' | ||
| + | [[File:AddHostsImage.png]] | ||
== Start the Task == | == Start the Task == | ||
| − | # | + | #Navigate to the Host Management area by clicking on '''Host Management''' from the top of the screen (the icon looks like a computer monitor) and then '''List All Hosts''' from the left hand menu. |
| + | #Find the entry for the client you are working with and click on its name to view the host object | ||
| + | #Click on '''Basic Tasks''' from the left hand menu | ||
#Select '''Deploy''' | #Select '''Deploy''' | ||
| − | #Select ''' | + | #Select '''Create Deploy Task for Host''' |
#Reboot the machine client PC. | #Reboot the machine client PC. | ||
Latest revision as of 00:37, 9 July 2016
Below is a brief overview of how to send an image to a single client
Contents
Set client to PXE boot in BIOS
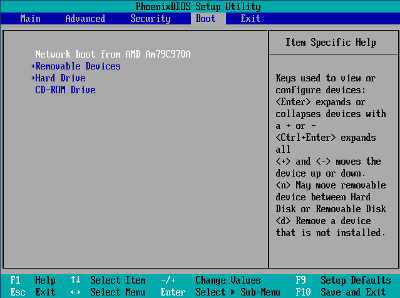
First of all make sure you are connected to the network in which your FOG server resides. Then boot up the client computer, and go into BIOS, this step may be a little different for every computer. In most cases this involves pressing either F2, F10, or DEL. Then you may need to enable PXE/Network booting if the option exists.
After that you want to change your boot order, so the first boot device is PXE boot. After making those changes, save your changes and restart the client.
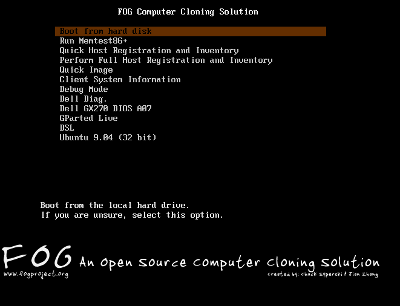
Start the client up again and you should see a menu that looks like the image below:
This is the FOG boot menu.
Register the Client with the FOG Server
Now that the client is pxe booting, we can register it with the FOG server. To do so, select "Perform Full Host Registration and Inventory." During this process you will be asked to answer a few questions like the client's hostname etc. After filling out all questions, the client will go through a quick hardware inventory and restart, at which point the client will be registered with the FOG server.
Associate the Image and OS with the new client
- Login to the web UI.
- Click on the Image Management Section (picture icon).
- Click on List All Images and locate the image object you wish to associate with the client. For more information on how to create an image object see Booting into FOG and Uploading your first Image.
- Click the Edit button next to the image.
- Select the appropriate operating system from the drop-down menu, if you have not done so already.
- Click Update
- Click on Host from the left hand column.
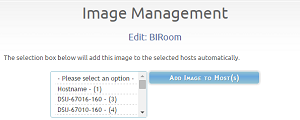
- From the menu in the center, select the client you are working with and click Add Image to Host(s)
Start the Task
- Navigate to the Host Management area by clicking on Host Management from the top of the screen (the icon looks like a computer monitor) and then List All Hosts from the left hand menu.
- Find the entry for the client you are working with and click on its name to view the host object
- Click on Basic Tasks from the left hand menu
- Select Deploy
- Select Create Deploy Task for Host
- Reboot the machine client PC.


