Difference between revisions of "BIOS and UEFI Co-Existence"
m (added place holders for linux DHCP dnsmasq and OS X) |
m (added option 003 place holder.) |
||
| Line 11: | Line 11: | ||
Please list dnsmasq steps here. | Please list dnsmasq steps here. | ||
| − | = Using Windows Server 2012 (r1) DHCP Policy = | + | = Using Windows Server 2012 (r1 and later) DHCP Policy = |
== Step 1 == | == Step 1 == | ||
| Line 63: | Line 63: | ||
[[File:Step 10.png]] | [[File:Step 10.png]] | ||
| + | |||
| + | = Using Windows Server 2008 (and earlier) using DHCP Option 003 = | ||
| + | |||
| + | == Option 003 steps here == | ||
| + | |||
| + | List option 003 steps here. | ||
= Using OS X DHCP = | = Using OS X DHCP = | ||
Revision as of 19:07, 9 July 2015
Contents
Using Linux DHCP
Steps Here
Please list linux steps here.
Using ProxyDHCP (dnsmasq)
Steps Here
Please list dnsmasq steps here.
Using Windows Server 2012 (r1 and later) DHCP Policy
Step 1
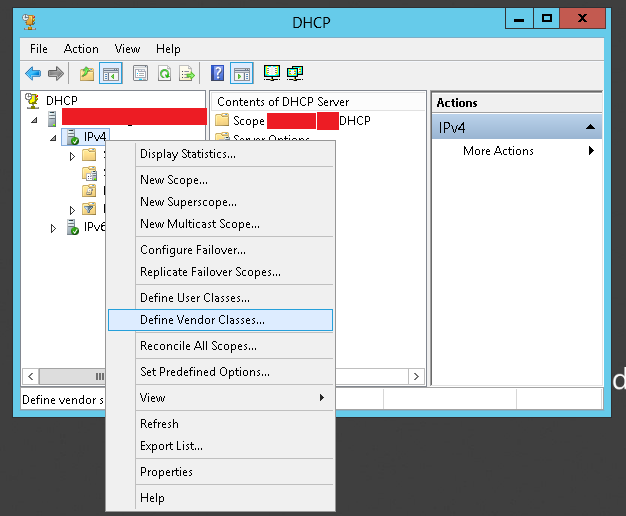
Right click IPv4, and pick "Define vendor class".
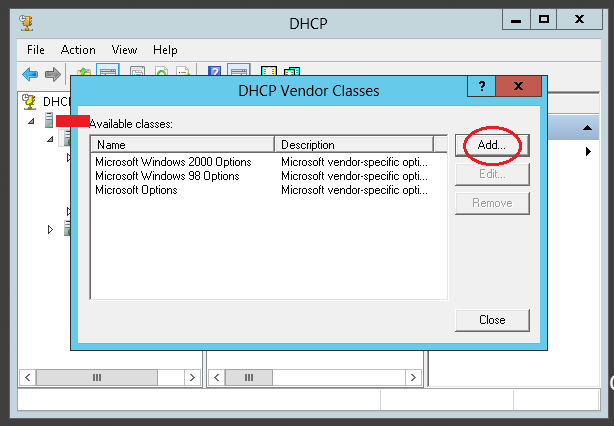
Step 2
Step 3
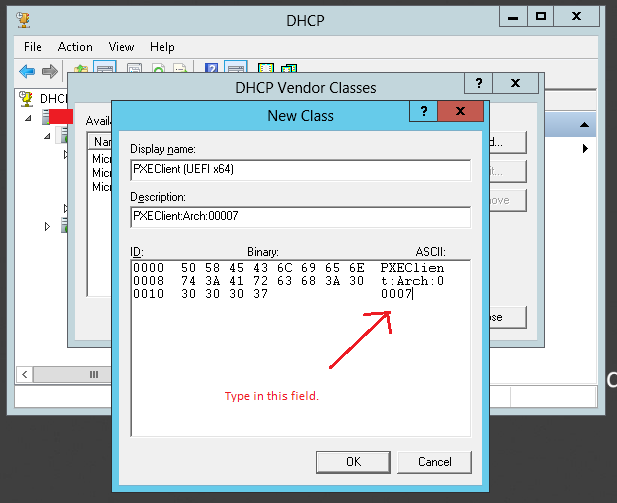
Here, The display name and description aren't really important but should describe what this does.
What's important is the "ASCII" field. In this field, you would type this:
PXEClient:Arch:00007
As you type this in, the ID and Binary fields will auto-update. When done, click Ok, ok, ok to finish this part of the procedure.
Step 4
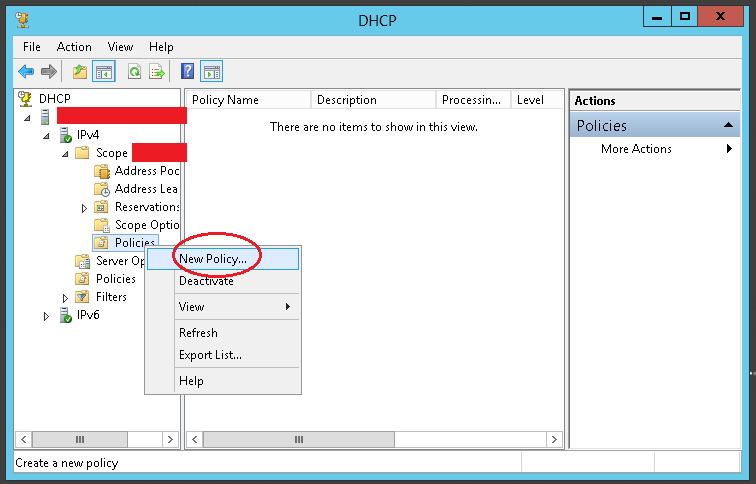
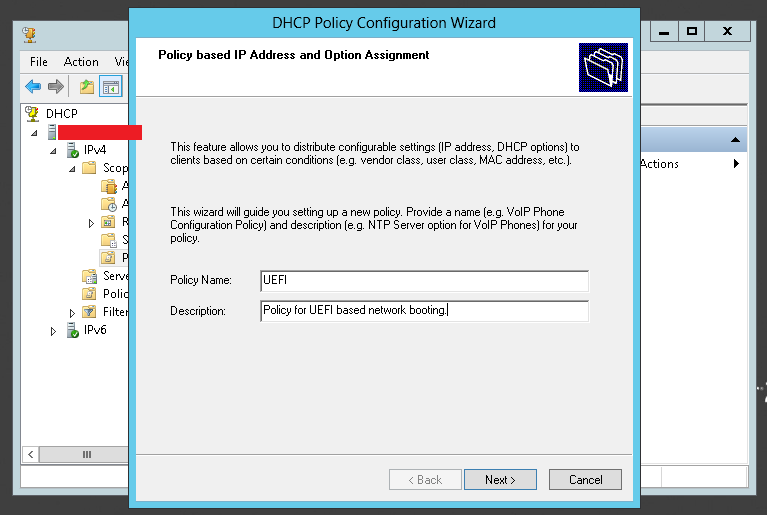
Underneath IPv4 -> Scope -> Policies, right click on "Policies" and choose "New Policy..."
Step 5
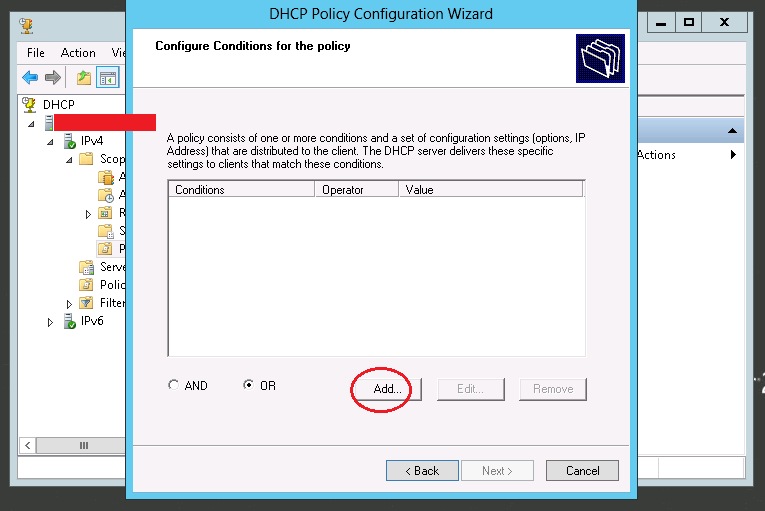
Step 6
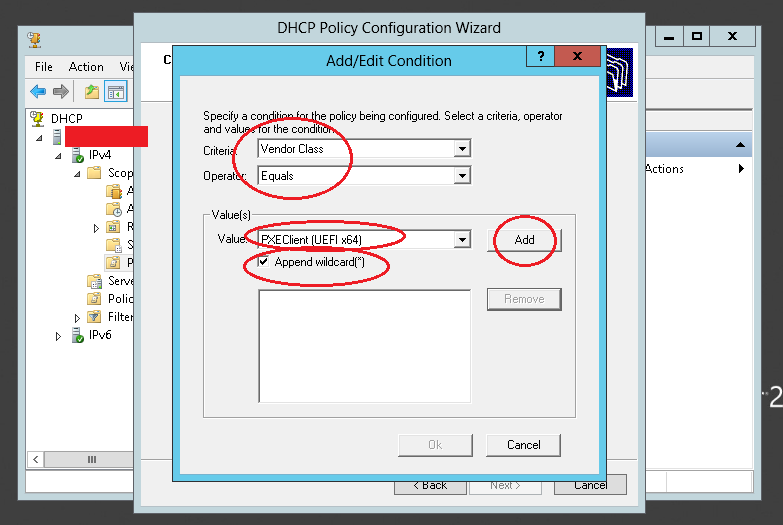
Step 7
Step 8
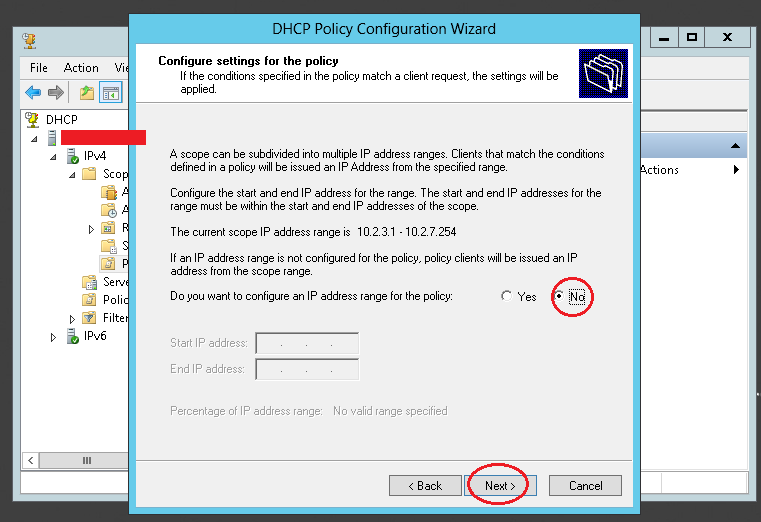
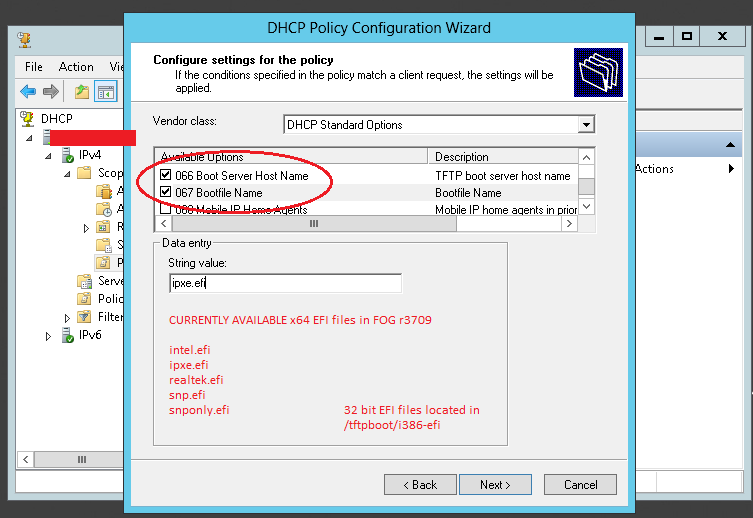
Step 9
Step 10
Using Windows Server 2008 (and earlier) using DHCP Option 003
Option 003 steps here
List option 003 steps here.
Using OS X DHCP
Steps Here
Please list OS X steps here.
