Difference between revisions of "Windows Storage Node"
(→Windows Step-by-Step) |
(→Windows Step-by-Step) |
||
| Line 8: | Line 8: | ||
=== Windows Step-by-Step=== | === Windows Step-by-Step=== | ||
| − | #Create folder C:\images | + | '''#Create folder C:\images |
#Create folder C:\images\dev | #Create folder C:\images\dev | ||
#Set Sharing | #Set Sharing | ||
| Line 14: | Line 14: | ||
#Set Security | #Set Security | ||
#Setup Filezilla Account | #Setup Filezilla Account | ||
| − | #Setup Filezilla Folders | + | #Setup Filezilla Folders''' |
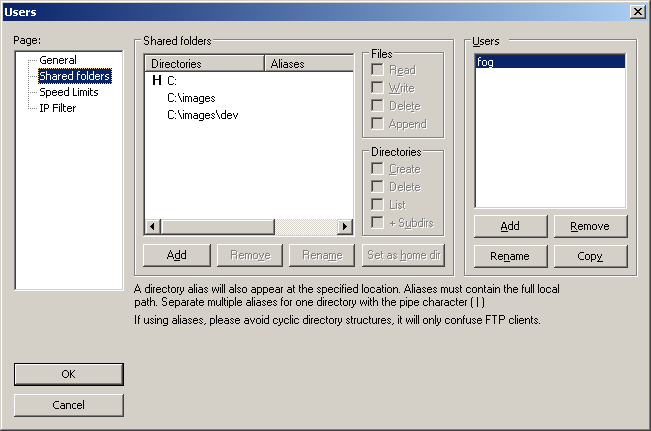
[[File:Filezilla folders.png|center|alt=A cartoon centipede reads books and types on a laptop.|Make sure these files $ Directories all have Read, write, delete, append rights]] | [[File:Filezilla folders.png|center|alt=A cartoon centipede reads books and types on a laptop.|Make sure these files $ Directories all have Read, write, delete, append rights]] | ||
Revision as of 23:49, 16 June 2014
Windows Storage Node
- This has been put together from the forum and should be useful to many. Windows Server NFS
Requirements
- Windows Server 2008 (R2)/Windows Server 2012 (R2)
- NFS Role Installed
- Filezilla Installed
Windows Step-by-Step
#Create folder C:\images
- Create folder C:\images\dev
- Set Sharing
- Set Permissions
- Set Security
- Setup Filezilla Account
- Setup Filezilla Folders
