BIOS and UEFI Co-Existence
Contents
General
To make network booting for several different client platforms possible you'd have to offer adequate boot images for those clients. To be able to distinguish between varying platforms the DHCP server needs to utilize the information send by the clients. According to RFC 4578 "the following pre-boot architecture types have been requested" (by the RFC):
           Type   Architecture Name
           ----   -----------------
             0    Intel x86PC
             1    NEC/PC98
             2    EFI Itanium
             3    DEC Alpha
             4    Arc x86
             5    Intel Lean Client
             6    EFI IA32
             7    EFI BC (EFI Byte Code)
             8    EFI Xscale
             9    EFI x86-64
Using Linux DHCP
According to this post there are (at least) three different ways to configure ISC DHCP server that way: http://www.syslinux.org/archives/2014-October/022683.html
Edit /etc/dhcp/dhcpd.conf and add the 'authoritative' option to your subnet definition and the following classes anywhere in the config:
subnet ... {
    authoritative;
    ...
}
...

class "pxeclient" {
    match if substring (option vendor-class-identifier, 0, 9) = "PXEClient";

    if substring (option vendor-class-identifier, 15, 5) = "00000" {
        # BIOS client
        filename "undionly.kpxe";
    }
    elsif substring (option vendor-class-identifier, 15, 5) = "00006" {
        # EFI client 32 bit
        filename   "ipxe32.efi";
    }
    else
        # EFI BC (00007) and EFI x86-64 (00009) are usually 64 bit
        filename   "ipxe.efi";
    }
}
When you have Mac OS clients as well you might want to check out this: FOG_on_a_MAC#architecture
Restart the DHCP service and you are good to go!
Using ProxyDHCP (dnsmasq)
Steps Here
Please list dnsmasq steps here.
Using Windows Server 2012 (r1 and later) DHCP Policy
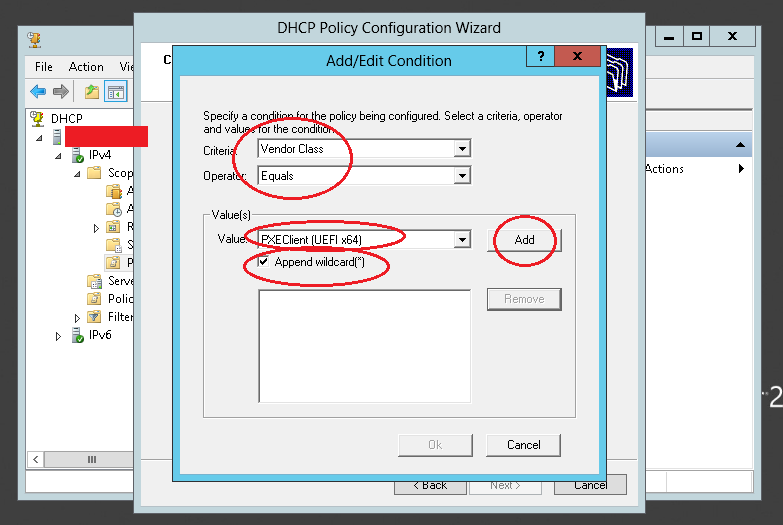
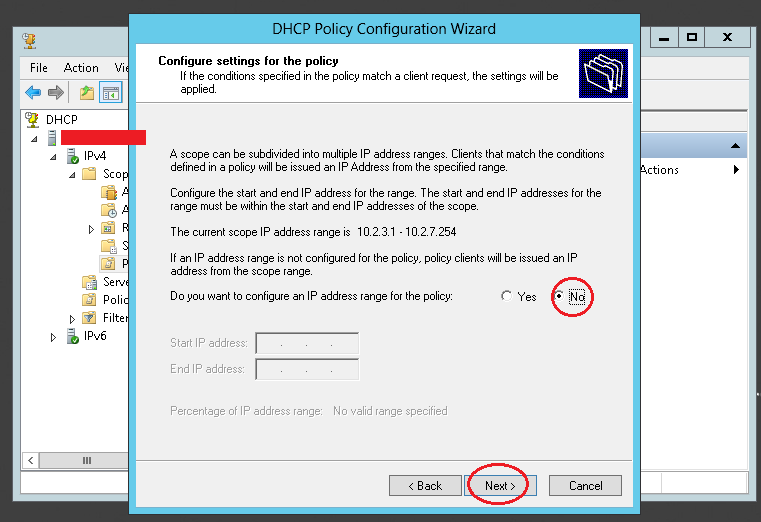
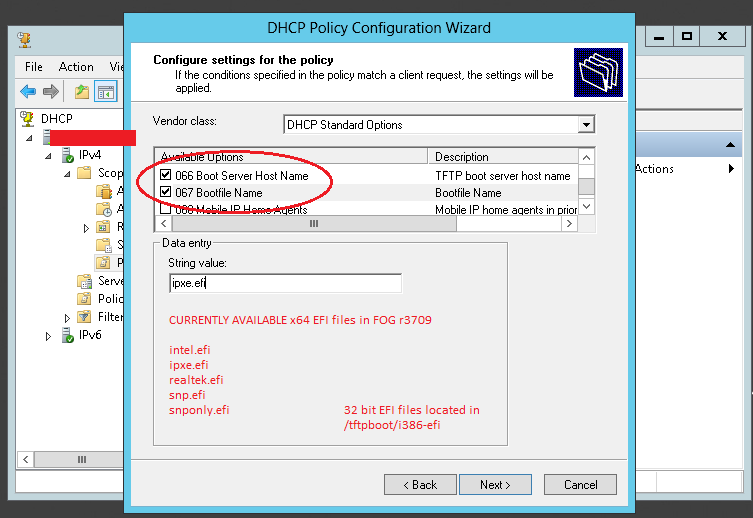
The below method assumes that your normal Scope options 066 and 067 are set for BIOS boot files. The below DHCP policy will only apply to UEFI based network booting. Regular BIOS based network booting will still use the default scope options set in the scope.
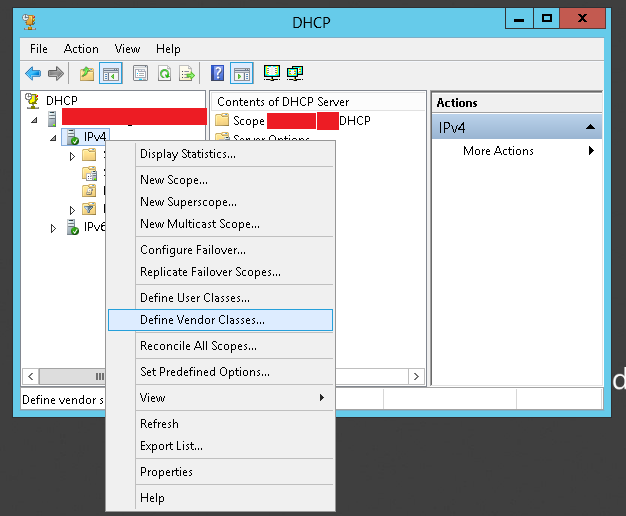
Step 1
Right click IPv4, and pick "Define vendor class".
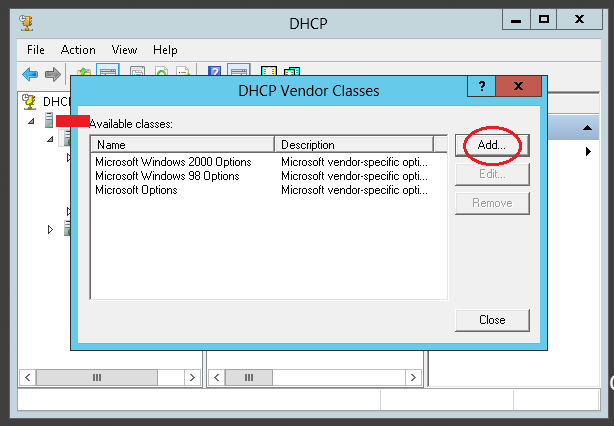
Step 2
Step 3
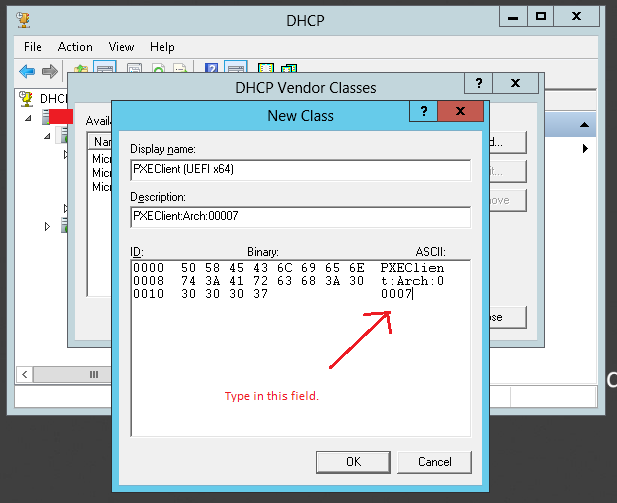
Here, The display name and description aren't really important but should describe what this does.
What's important is the "ASCII" field. In this field, you would type this:
PXEClient:Arch:00007
As you type this in, the ID and Binary fields will auto-update. When done, click Ok, ok, ok to finish this part of the procedure.
Step 4
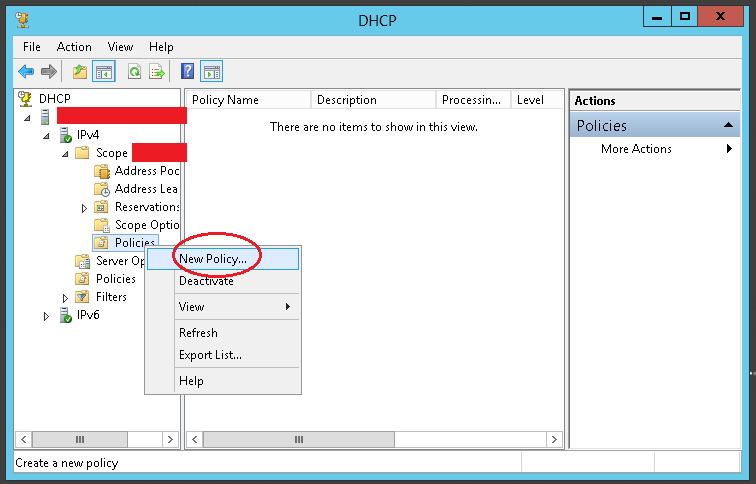
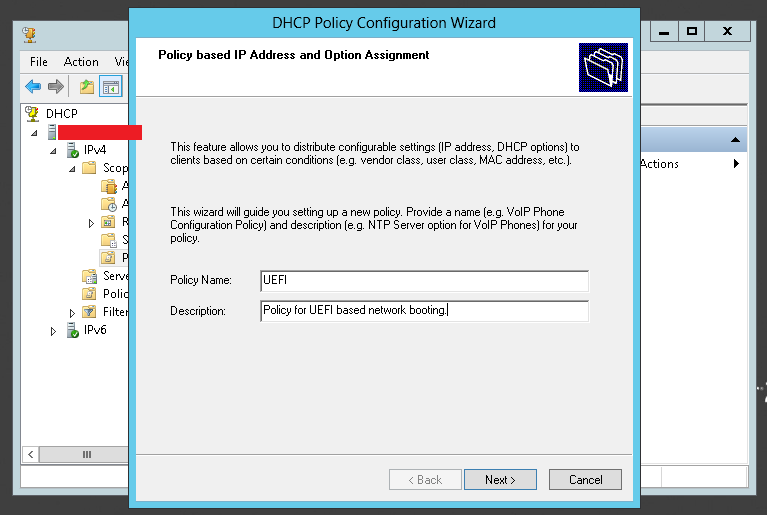
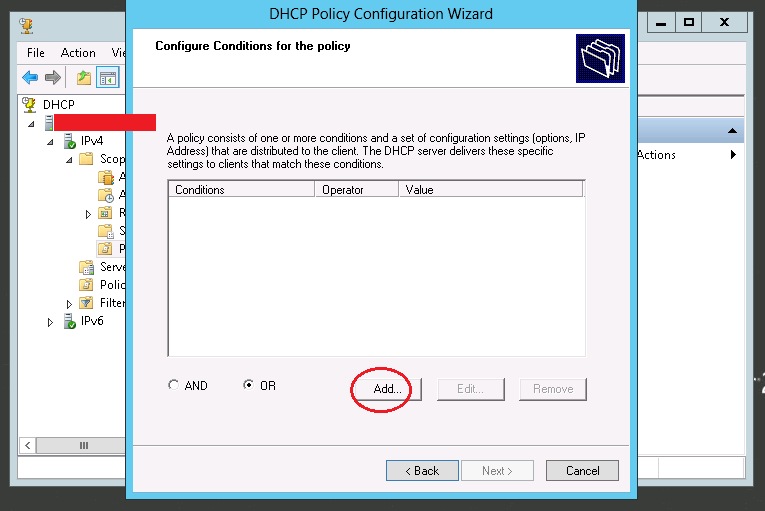
Underneath IPv4 -> Scope -> Policies, right click on "Policies" and choose "New Policy..."
Step 5
Step 6
Step 7
Step 8
Step 9
Step 10
Using Windows Server 2008 (and earlier) using DHCP Option 003
Option 003 steps here
List option 003 steps here.
Using OS X DHCP
Steps Here
Please list OS X steps here.
