Installation on Fedora 8
Contents
Fedora 8
Overview
- Note * Please understand that this tutorial will have you destroy all data on your hard disk.
Fedora is a Free Linux based operating system. This installation guide assumes that you have a basic understanding of the Linux command line environment, with using commands like ls, cp, mkdir.
If you wish to use a large storage device to store your images, like a raid array or separate hard disk, it should be mounted during installation as /images.
Known Issues
The FOG installer will only work cleanly on English versions of Fedora. (Fixed with version 0.13 of FOG!)
After you are done installing FOG you are going to need to update / edit a few settings in Fedora before the server is fully working and usable. Please see the links below for configuration changes that will need to take place.
Installing Fedora
The first thing to do is download and burn an ISO image of Fedora 8 or later from http://fedoraproject.org/. You may use either the 32 or 64 bit versions, both have been reported to work without issue.
Next boot off the CD / DVD you just created to start the Fedora installation process. (We do not recommend that you attempt to install the OS that will be running FOG in a VM environment, as many users have reported performance related issues!)
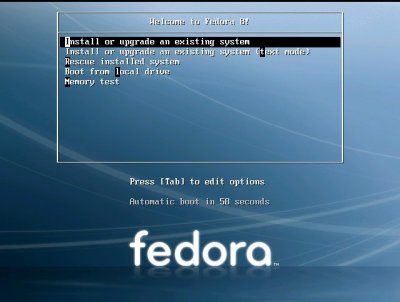
You should see a screen similar to the pictured below, select: Install or Upgrade an existing System and press enter.
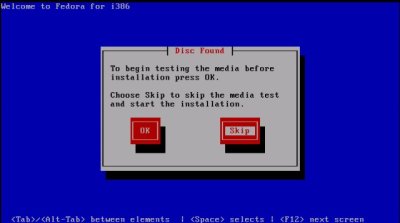
You will then be prompted if you would like to test the installation media, choose: Skip and press enter.
If you run into problems with your installation you can start the installation process over and run the media test to check for a bad burn.
Now the graphical portion of the installation will begin. At the welcome screen, press: Next.
Next you will be prompted for the installation language, choose you appropriate language and press: Next.
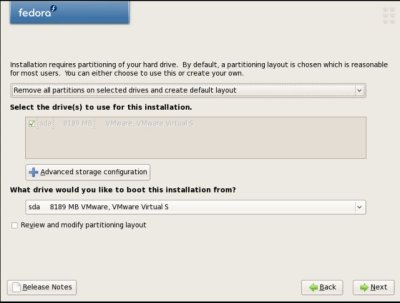
You will now be asked about disk partitioning. Select Remove all partition on the selected drives and create default layout, then click: Next. If you have a large disk or storage array this is the point where you would manually partition the drive and mount that disk/array as /images.
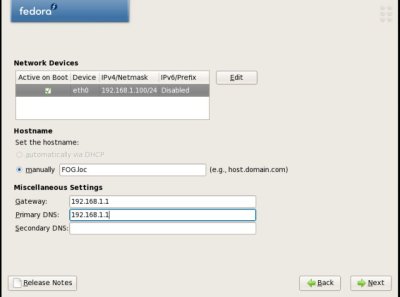
You will now be asked about network addressing, select the network device you would like to use by putting an check in the box next to the device name then, click on the edit button.
Assign the network device a IPv4 address with subnet mask and disable IPv6 support, then click OK.
Enter a DNS server and gateway address along with a hostname, then click: Next.
Next you will be prompted about you timezone information, select your timezone and click: Next.
The next screen will prompt you to create a root password, enter a password in the textbox and confirm, then press: Next. Remember this password you will need it later.
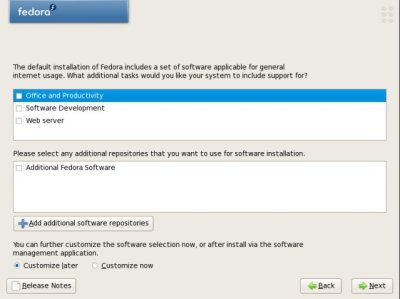
The next screen will prompt you to select the software groups you would like to install, uncheck Office and Productivity and then click: Next.
Then on the next screen click Next to start the installation. This step will take some time, so please be patient. When installation is complete, remove all disks from the CD/DVD drive and click reboot to restart the computer.
Selecting First Boot Settings
The first time Fedora boots it will load a setup wizard, which allows you select how you would like Fedora to operate. These options have changed in later versions of Fedora, so it options for SELinux and Firewall are not present that will have to be configured after login.
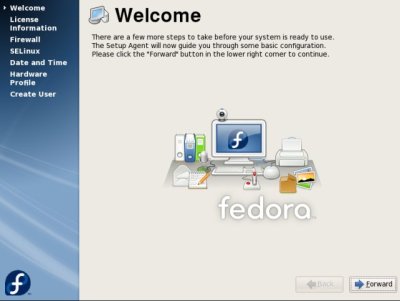
At the first boot welcome screen, click: Forward.
The next screen will ask you to accept the license agreement, do so and click: Forward.
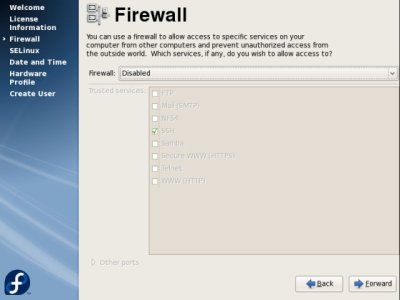
The next screen is about the firewall, change the firewall to: Disabled and click: Forward.
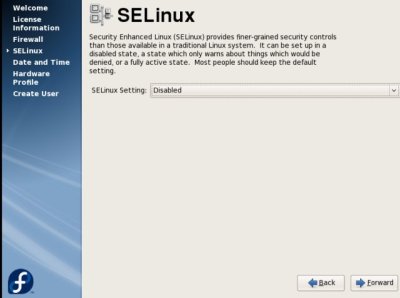
The next screen will ask you about SELinux, set SELinux Setting to: Disabled and click: Forward.
The next screen will prompt you for the date and time settings, click: Forward.
The next screen will ask if you would like to send your hardware profile to Fedora select an option and click: Forward.
You will now be prompted to create a user, create a regular user that can be used after the FOG installation process. For the installation of FOG we will use the root user we created earlier in the installation process. You can proceed by clicking: Forward.
The first boot wizard is now complete and you will be prompted to restart your computer.
Setting up FOG
(health warning: this flash video consumed all 1.5GB of my physical (ram) and virtual (swap) memory while it played, when it was all used up, the video crashed)
If you are running Fedora 9 +, you will need to disable SELinux and IPTables before installing FOG.
Your system is now ready to login to and install the FOG application suite.
Log into Fedora using the root username and password you created during installation.
Now we must download the FOG package from sourceforge. To do this click on
Applications -> Internet -> Firefox Web Browser
and enter the URL http://www.sf.net/projects/freeghost.
Then click on the Download link.
Then click on the latest release to start the download and save the package to the /opt directory. It should be named something like fog_x.xx.tar.gz
Open a terminal
Applications -> System Tools -> Terminal
and type:
cd /opt
tar -xvzf fog*
cd fog*
cd bin
./installfog.sh
You will be prompted for the Linux distro you are installing, enter 1 and press enter.
You will be prompted for the installation mode, either N (Normal Server) or S(Storage Server). If you are not sure which option to select, use N for Normal Installation. (Version 0.24 and up)
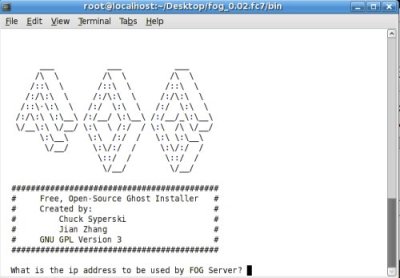
The installer will ask you for the IP address of the server, then press enter.
The installer will ask if you would like to enter a router address for DHCP, if you would like to press y and press enter, then enter the address, then press enter.
The installer will ask if you would like to enter a DNS address for DHCP and the boot image, if you would like to press y and press enter, then enter the address, then press enter.
You would then be prompted if you would like to change the default interface from eth0, if you would like press y, press enter and add the interface (if you are unsure, select n).
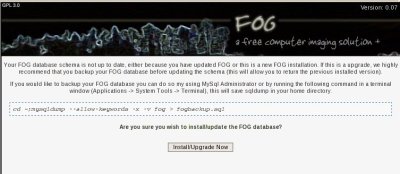
After the installation has completed open Firefox again and enter the URL: http://[youripaddress]/fog/management. You will then be prompted to install the database schema. Click on the Install/Update Now button.
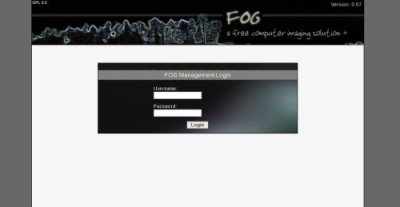
When the schema is up to date, attempt to go to the URL: http://[youripaddress]/fog/management again. This time you should be prompted to login
username: fog
password: password.
Setting up Wake On Lan
If you would like to use wake on lan with FOG, you will have to run the following commands as root:
visudo
Scroll to the line that says
Defaults requiretty
Press i to enter insert mode. Change the line to:
# Defaults requiretty
Hit ESC to exit insert mode. Now type:
:wq
and press the enter key.
Testing your installation
After login, click on the Hosts button (single computer monitor).
Then click on the Add New Host button. Enter at least a MAC address (seperated by :) and a hostname and click the Add button.
Now click on the Tasks button (the star).
Then click on List All Hosts and find the host you just created and click on the Advanced button.
Now under Advanced Actions click on Memtest86+ and confirm that you would like to start the task.
Now click on Active Tasks and you should see the task that you just created listed.
Lastly, start the client computer that you created a task for and ensure that in BIOS, PXE boot has the highest boot priority. If everything worked correctly, you should see memtest86+ load.
Notes
- Be sure to assign a STATIC ip address to your PC or FOG won’t work correctly.
- Be sure to uncheck ‘firewall, selinux’ when creating the initial system. This will prevent problems later in the install.
- Also your computer needs to be working and ‘internet’ functional prior to running the FOG install. FOG goes out to the internet to get the packages necessary for installation. It is a good idea to update your system PRIOR to installing FOG, via the ‘yum update’ command.
- Please be aware of the following prior to reboot following the installation: FOG installs a DHCP server, so if you have another DHCP server, it will conflict with it. Probably a good idea to put the FOG server on a dedicated ‘lab’ network w/o a dhcp server, or that you disable FOG's DHCP server. Also it is CRITICAL that you type in the ‘correct’ ip address for the FOG server, probably the IP that you chose for the initial install.
